采用kubeadm 工具进行机器安装。
创建一个Master节点
kubeadm init
将一个节点加入到集群中
kubeadm join <Master节点的IP和端口>
清空初始化环境
kubeadm reset
# 1. 安装要求
一台或多台机器,操作系统Centos7.8 x86_64
硬件配置 内存至少2G,至少2个CPU,硬盘40G以上
集群机器网络互通
可以访问外网,需要拉取镜像
禁止swap分区
# 2. 准备环境
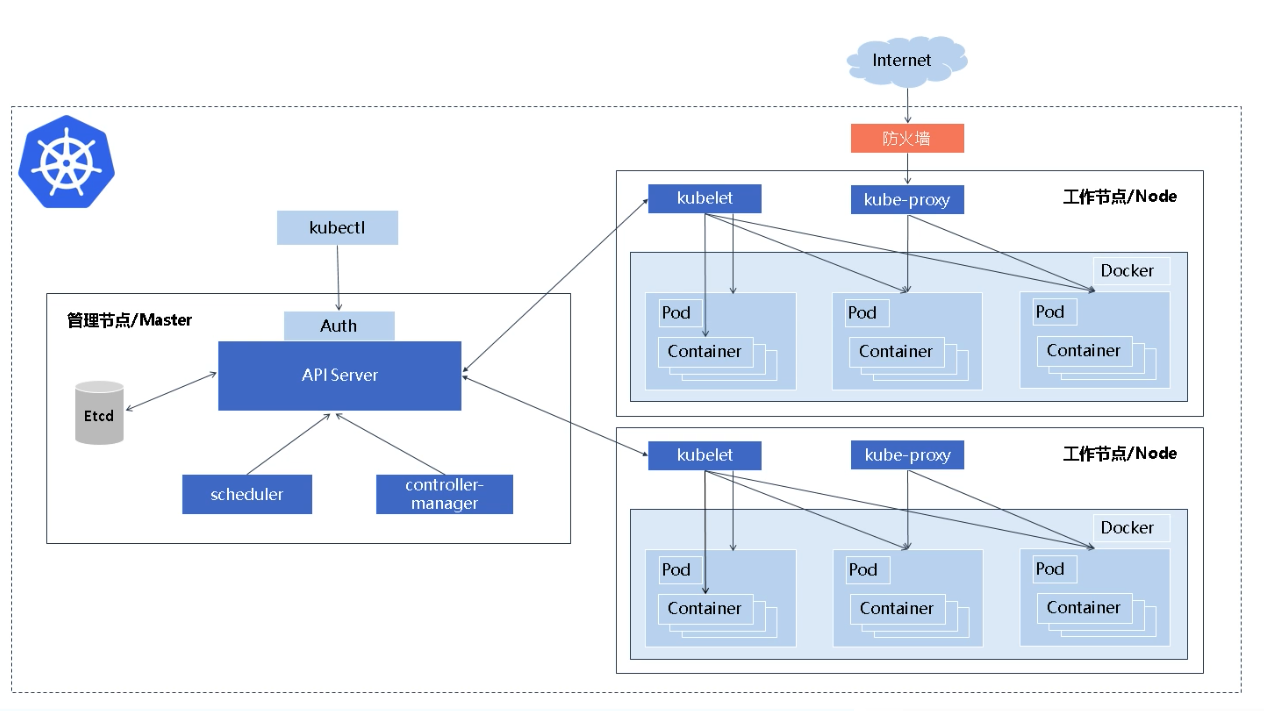
# 2.1 架构图

# 2.2 IP规划
| 名称 | 公网IP | 内网IP | 配置 |
|---|---|---|---|
| k8s-master | 139.196.155.90 | 172.16.109.178 | 2核4g |
| k8s-node1 | 106.15.248.202 | 172.16.109.179 | 2核4g |
| k8s-node2 | 106.14.247.151 | 172.16.109.180 | 2核4g |
# 2.3 控制平面节点
| 协议 | 方向 | 端口范围 | 作用 | 使用者 |
|---|---|---|---|---|
| TCP | 入站 | 6443 | Kubernetes API 服务器 | 所有组件 |
| TCP | 入站 | 2379-2380 | etcd 服务器客户端 API | kube-apiserver, etcd |
| TCP | 入站 | 10250 | Kubelet API | kubelet 自身、控制平面组件 |
| TCP | 入站 | 10251 | kube-scheduler | kube-scheduler 自身 |
| TCP | 入站 | 10252 | kube-controller-manager | kube-controller-manager 自身 |
# 2.4 工作节点
| 协议 | 方向 | 端口范围 | 作用 | 使用者 |
|---|---|---|---|---|
| TCP | 入站 | 10250 | Kubelet API | kubelet 自身、控制平面组件 |
| TCP | 入站 | 30000-32767 | NodePort 服务† | 所有组件 |
# 2.5 准备环境
# 修改主机名称
hostnamectl set-hostname k8s-master
hostnamectl set-hostname k8s-node1
hostnamectl set-hostname k8s-node2

# 关闭防火墙
systemctl stop firewalld
systemctl disable firewalld

# 关闭selinux
sed -i 's/enforcing/disabled/' /etc/selinux/config # 永久关闭,需要重启(reboot)
setenforce 0 # 临时关闭

# 关闭swap
swapoff -a     # 临时
sed -ri 's/.*swap.*/#&/' /etc/fstab  # 永久,需要重启(reboot)


# 添加主机名与IP对应关系
cat >> /etc/hosts << EOF
172.16.109.178 k8s-master
172.16.109.179 k8s-node1
172.16.109.180 k8s-node2
EOF

# 配置网络转发
cat <<EOF > /etc/sysctl.d/k8s.conf
net.bridge.bridge-nf-call-ip6tables = 1
net.bridge.bridge-nf-call-iptables = 1
EOF
sysctl --system # 让配置生效

# 时间同步
yum install ntpdate -y
ntpdate time.windows.com


# 配置 kubernetes yum 源
cat > /etc/yum.repos.d/kubernetes.repo << EOF
[kubernetes]
name=Kubernetes
baseurl=https://mirrors.aliyun.com/kubernetes/yum/repos/kubernetes-el7-x86_64
enabled=1
gpgcheck=0
repo_gpgcheck=0
gpgkey=https://mirrors.aliyun.com/kubernetes/yum/doc/yum-key.gpg https://mirrors.aliyun.com/kubernetes/yum/doc/rpm-package-key.gpg
EOF

# 重启
reboot
1
2
3
4
5
6
7
8
9
10
11
12
13
14
15
16
17
18
19
20
21
22
23
24
25
26
27
28
29
30
31
32
33
34
35
36
37
38
39
40
41
42
43
44
45
46
47
48
49
50
2
3
4
5
6
7
8
9
10
11
12
13
14
15
16
17
18
19
20
21
22
23
24
25
26
27
28
29
30
31
32
33
34
35
36
37
38
39
40
41
42
43
44
45
46
47
48
49
50
# 3. 安装docker,kubeadm,kubelet
# 3.1 安装docker
# 获取镜像源
wget https://mirrors.aliyun.com/docker-ce/linux/centos/docker-ce.repo -O /etc/yum.repos.d/docker-ce.repo

yum install -y docker-ce && systemctl enable docker && systemctl start docker
# 查看是否安装成功
docker --version
1
2
3
4
5
6
2
3
4
5
6
# 设置镜像加速器
touch /etc/docker/daemon.json
cat > /etc/docker/daemon.json <<-'EOF'
{
  "exec-opts": ["native.cgroupdriver=systemd"],
  "registry-mirrors": ["https://b9pmyelo.mirror.aliyuncs.com"]
}
EOF

# 重载配置
systemctl daemon-reload
# 重启docker
systemctl restart docker
1
2
3
4
5
6
7
8
9
10
11
12
13
2
3
4
5
6
7
8
9
10
11
12
13
# 3.2 安装k8s组件
yum install -y kubelet kubeadm kubectl --disableexcludes=kubernetes

# 为了实现Docker使用的cgroup drvier和kubelet使用的cgroup drver一致,需要修改"/etc/sysconfig/kubelet"文件的内容:
vim /etc/sysconfig/kubelet
# 修改
KUBELET_EXTRA_ARGS="--cgroup-driver=systemd"
systemctl enable kubelet && systemctl start kubelet
1
2
3
4
5
6
7
2
3
4
5
6
7
如果出现 error: open /var/lib/kubelet/config.yaml: no such file or directory,可以不处理,直接通过kubeadm init 去创建并且启动kubelet服务。
# 4. 部署Kubernetes Master
# 由于默认拉取镜像地址k8s.gcr.io国内无法访问,这里需要指定阿里云镜像仓库地址
# 只在master执行
kubeadm init \
  --apiserver-advertise-address=172.16.109.178 \
  --image-repository registry.aliyuncs.com/google_containers \
  --kubernetes-version v1.23.0 \
  --service-cidr=10.96.0.0/12 \
  --pod-network-cidr=10.244.0.0/16
1
2
3
4
5
6
7
8
2
3
4
5
6
7
8
- --apiserver-advertise-address 集群通告地址
- --image-repository 指定阿里云镜像仓库地址
- --kubernetes-version k8s版本,与安装的一致
- --service-cidr 集群内部虚拟网络,pod统一访问入口
- --pod-network-cidr pod网络,与下面部署的CNI网络组建yaml中保持一致
安装过程日志:
[root@k8s-master yum.repos.d]# kubeadm init \
> --apiserver-advertise-address=172.16.109.178 \
> --image-repository registry.aliyuncs.com/google_containers \
> --kubernetes-version v1.22.4 \
> --service-cidr=10.96.0.0/12 \
> --pod-network-cidr=10.244.0.0/16
[init] Using Kubernetes version: v1.22.4
[preflight] Running pre-flight checks
[preflight] Pulling images required for setting up a Kubernetes cluster
[preflight] This might take a minute or two, depending on the speed of your internet connection
[preflight] You can also perform this action in beforehand using 'kubeadm config images pull'
[certs] Using certificateDir folder "/etc/kubernetes/pki"
[certs] Generating "ca" certificate and key
[certs] Generating "apiserver" certificate and key
[certs] apiserver serving cert is signed for DNS names [k8s-master kubernetes kubernetes.default kubernetes.default.svc kubernetes.default.svc.cluster.local] and IPs [10.96.0.1 172.16.109.178]
[certs] Generating "apiserver-kubelet-client" certificate and key
[certs] Generating "front-proxy-ca" certificate and key
[certs] Generating "front-proxy-client" certificate and key
[certs] Generating "etcd/ca" certificate and key
[certs] Generating "etcd/server" certificate and key
[certs] etcd/server serving cert is signed for DNS names [k8s-master localhost] and IPs [172.16.109.178 127.0.0.1 ::1]
[certs] Generating "etcd/peer" certificate and key
[certs] etcd/peer serving cert is signed for DNS names [k8s-master localhost] and IPs [172.16.109.178 127.0.0.1 ::1]
[certs] Generating "etcd/healthcheck-client" certificate and key
[certs] Generating "apiserver-etcd-client" certificate and key
[certs] Generating "sa" key and public key
[kubeconfig] Using kubeconfig folder "/etc/kubernetes"
[kubeconfig] Writing "admin.conf" kubeconfig file
[kubeconfig] Writing "kubelet.conf" kubeconfig file
[kubeconfig] Writing "controller-manager.conf" kubeconfig file
[kubeconfig] Writing "scheduler.conf" kubeconfig file
[kubelet-start] Writing kubelet environment file with flags to file "/var/lib/kubelet/kubeadm-flags.env"
[kubelet-start] Writing kubelet configuration to file "/var/lib/kubelet/config.yaml"
[kubelet-start] Starting the kubelet
[control-plane] Using manifest folder "/etc/kubernetes/manifests"
[control-plane] Creating static Pod manifest for "kube-apiserver"
[control-plane] Creating static Pod manifest for "kube-controller-manager"
[control-plane] Creating static Pod manifest for "kube-scheduler"
[etcd] Creating static Pod manifest for local etcd in "/etc/kubernetes/manifests"
[wait-control-plane] Waiting for the kubelet to boot up the control plane as static Pods from directory "/etc/kubernetes/manifests". This can take up to 4m0s
[apiclient] All control plane components are healthy after 10.003315 seconds
[upload-config] Storing the configuration used in ConfigMap "kubeadm-config" in the "kube-system" Namespace
[kubelet] Creating a ConfigMap "kubelet-config-1.22" in namespace kube-system with the configuration for the kubelets in the cluster
[upload-certs] Skipping phase. Please see --upload-certs
[mark-control-plane] Marking the node k8s-master as control-plane by adding the labels: [node-role.kubernetes.io/master(deprecated) node-role.kubernetes.io/control-plane node.kubernetes.io/exclude-from-external-load-balancers]
[mark-control-plane] Marking the node k8s-master as control-plane by adding the taints [node-role.kubernetes.io/master:NoSchedule]
[bootstrap-token] Using token: v2st7b.1fyblfkj4vpjoz0e
[bootstrap-token] Configuring bootstrap tokens, cluster-info ConfigMap, RBAC Roles
[bootstrap-token] configured RBAC rules to allow Node Bootstrap tokens to get nodes
[bootstrap-token] configured RBAC rules to allow Node Bootstrap tokens to post CSRs in order for nodes to get long term certificate credentials
[bootstrap-token] configured RBAC rules to allow the csrapprover controller automatically approve CSRs from a Node Bootstrap Token
[bootstrap-token] configured RBAC rules to allow certificate rotation for all node client certificates in the cluster
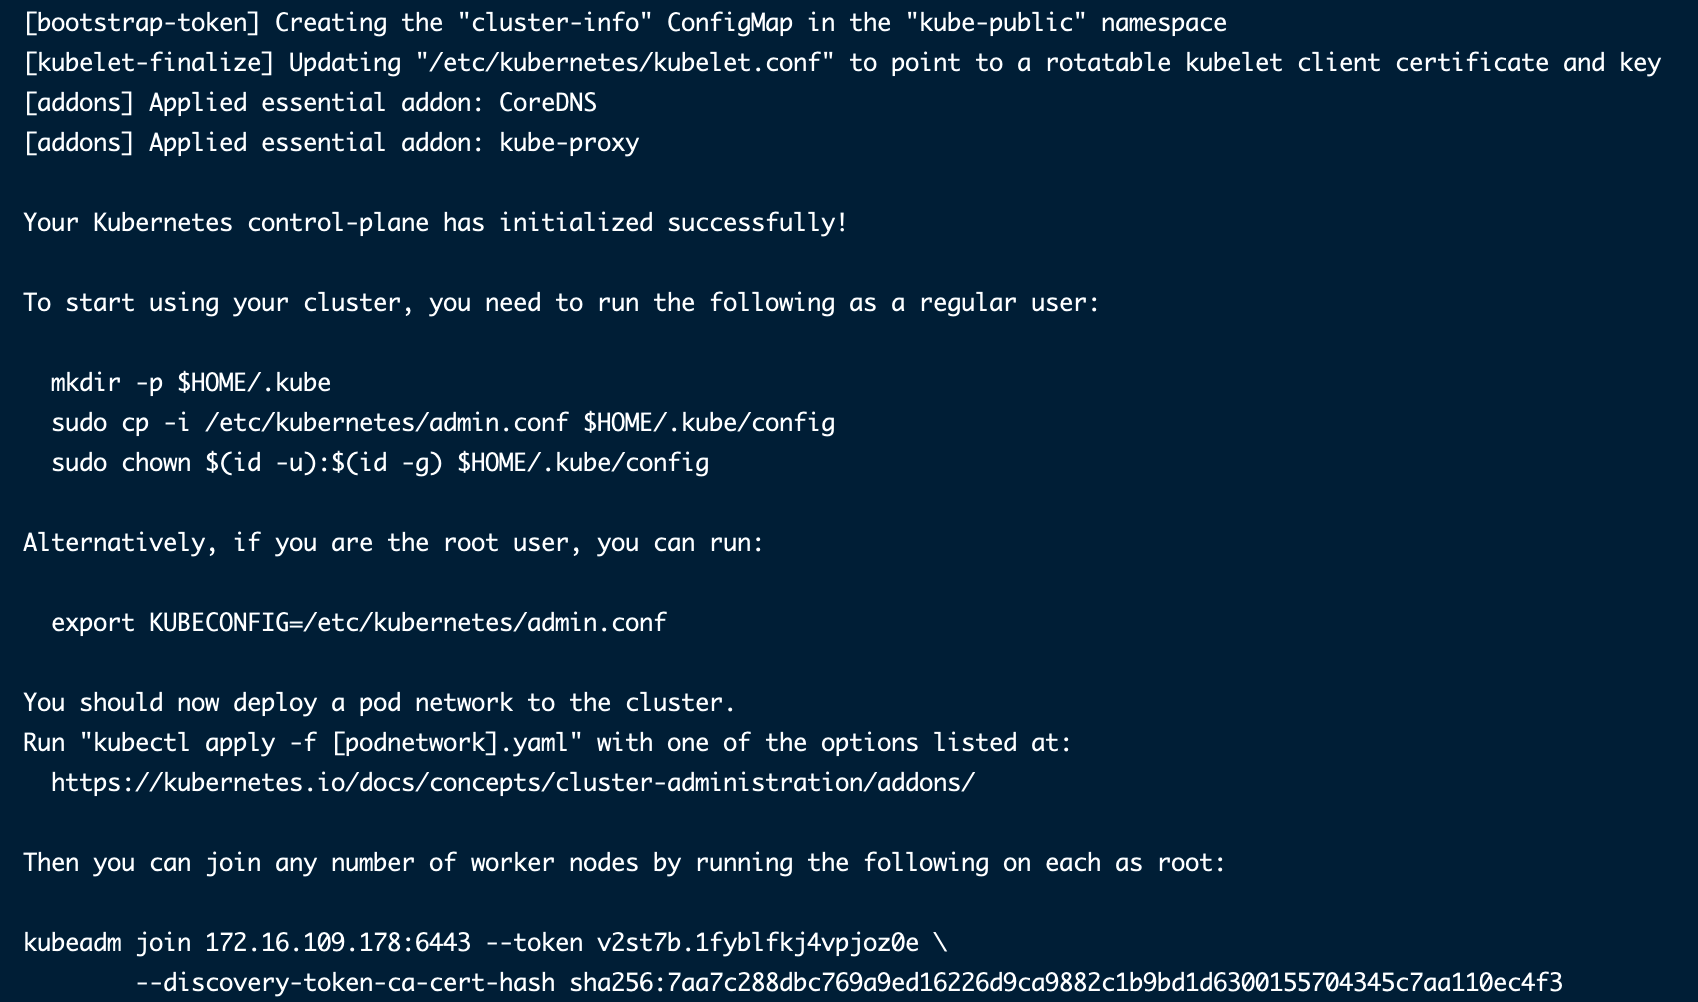
[bootstrap-token] Creating the "cluster-info" ConfigMap in the "kube-public" namespace
[kubelet-finalize] Updating "/etc/kubernetes/kubelet.conf" to point to a rotatable kubelet client certificate and key
[addons] Applied essential addon: CoreDNS
[addons] Applied essential addon: kube-proxy
Your Kubernetes control-plane has initialized successfully!
To start using your cluster, you need to run the following as a regular user:
mkdir -p $HOME/.kube
sudo cp -i /etc/kubernetes/admin.conf $HOME/.kube/config
sudo chown $(id -u):$(id -g) $HOME/.kube/config
Alternatively, if you are the root user, you can run:
export KUBECONFIG=/etc/kubernetes/admin.conf
You should now deploy a pod network to the cluster.
Run "kubectl apply -f [podnetwork].yaml" with one of the options listed at:
https://kubernetes.io/docs/concepts/cluster-administration/addons/
Then you can join any number of worker nodes by running the following on each as root:
kubeadm join 172.16.109.178:6443 --token v2st7b.1fyblfkj4vpjoz0e \
--discovery-token-ca-cert-hash sha256:7aa7c288dbc769a9ed16226d9ca9882c1b9bd1d6300155704345c7aa110ec4f3
1
2
3
4
5
6
7
8
9
10
11
12
13
14
15
16
17
18
19
20
21
22
23
24
25
26
27
28
29
30
31
32
33
34
35
36
37
38
39
40
41
42
43
44
45
46
47
48
49
50
51
52
53
54
55
56
57
58
59
60
61
62
63
64
65
66
67
68
69
70
71
72
73
74
75
76
77
2
3
4
5
6
7
8
9
10
11
12
13
14
15
16
17
18
19
20
21
22
23
24
25
26
27
28
29
30
31
32
33
34
35
36
37
38
39
40
41
42
43
44
45
46
47
48
49
50
51
52
53
54
55
56
57
58
59
60
61
62
63
64
65
66
67
68
69
70
71
72
73
74
75
76
77
kubeadm init初始化工作:
1、[preflight] 环境检查和拉取镜像 kubeadm config images pull
2、[certs] 生成k8s证书和etcd证书 /etc/kubernetes/pki
3、[kubeconfig] 生成kubeconfig文件
4、[kubelet-start] 生成kubelet配置文件和启动
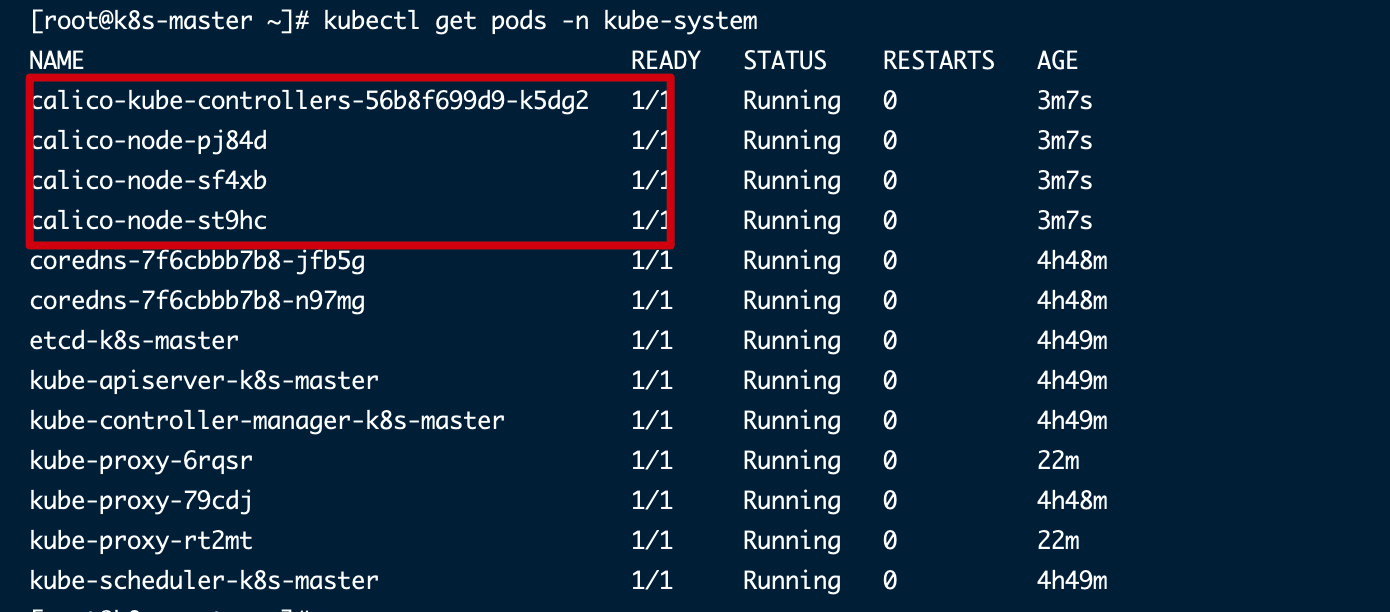
5、[control-plane] 部署管理节点组件,用镜像启动容器 kubectl get pods -n kube-system
6、[etcd] 部署etcd数据库,用镜像启动容器
7、[upload-config] [kubelet] [upload-certs] 上传配置文件到k8s中
8、[mark-control-plane] 给管理节点添加一个标签 master, 再添加一个污点 [node-role.kubernetes.io/master:NoSchedule]
9、[bootstrap-token] 自动为kubelet颁发证书
10、[addons] 部署插件 CoreDNS,kube-proxy
1
2
3
4
5
6
7
8
9
10
2
3
4
5
6
7
8
9
10
# 配置环境变量(只在master执行)
mkdir -p $HOME/.kube
sudo cp -i /etc/kubernetes/admin.conf $HOME/.kube/config
sudo chown $(id -u):$(id -g) $HOME/.kube/config
1
2
3
4
2
3
4
如果是 root 用户,直接执行如下命令:
export KUBECONFIG=/etc/kubernetes/admin.conf
1
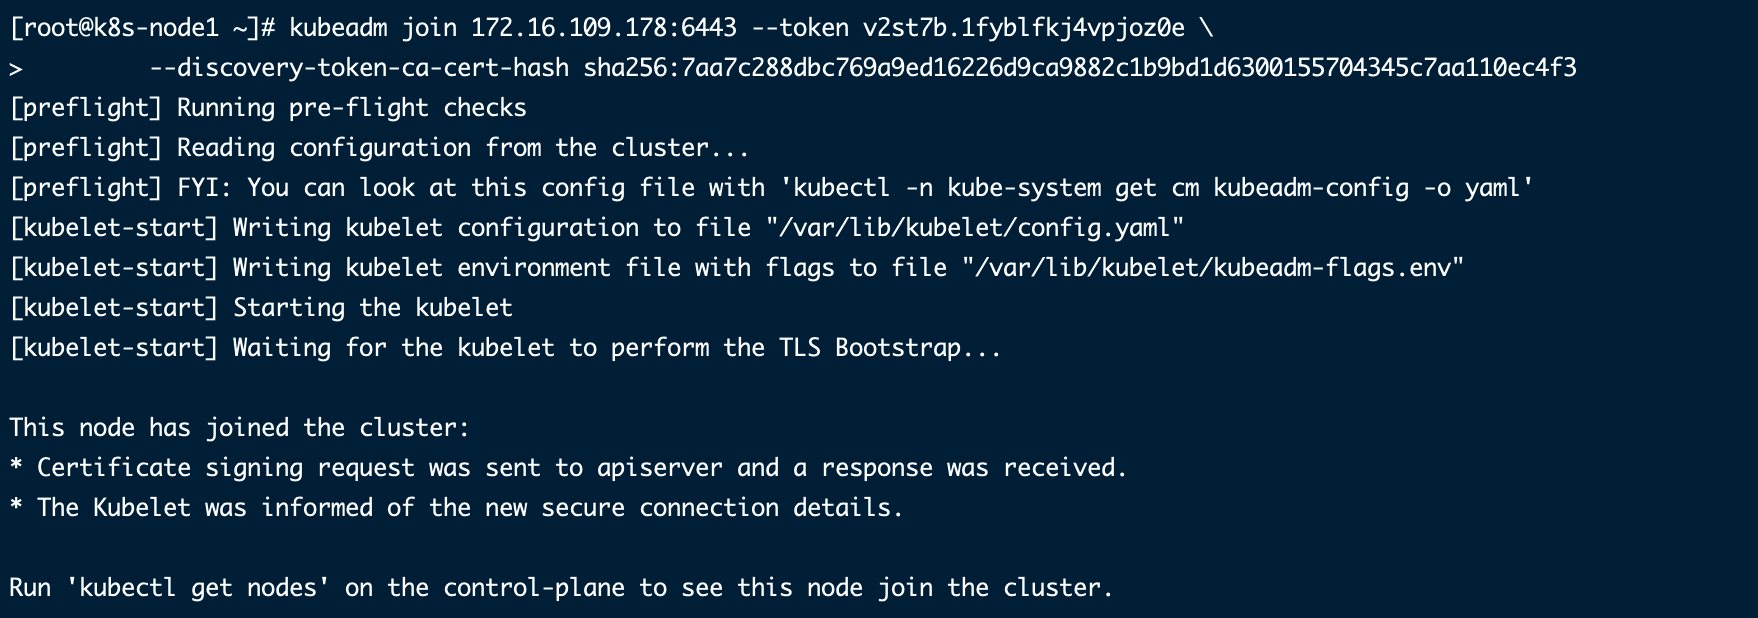
# 5. 加入Kubernetes Node
kubeadm join 172.16.109.178:6443 --token v2st7b.1fyblfkj4vpjoz0e \
        --discovery-token-ca-cert-hash sha256:7aa7c288dbc769a9ed16226d9ca9882c1b9bd1d6300155704345c7aa110ec4f3
1
2
2
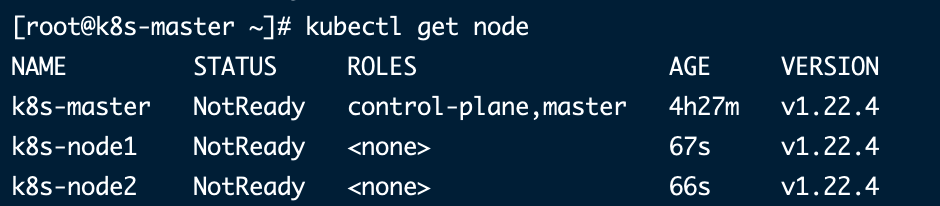
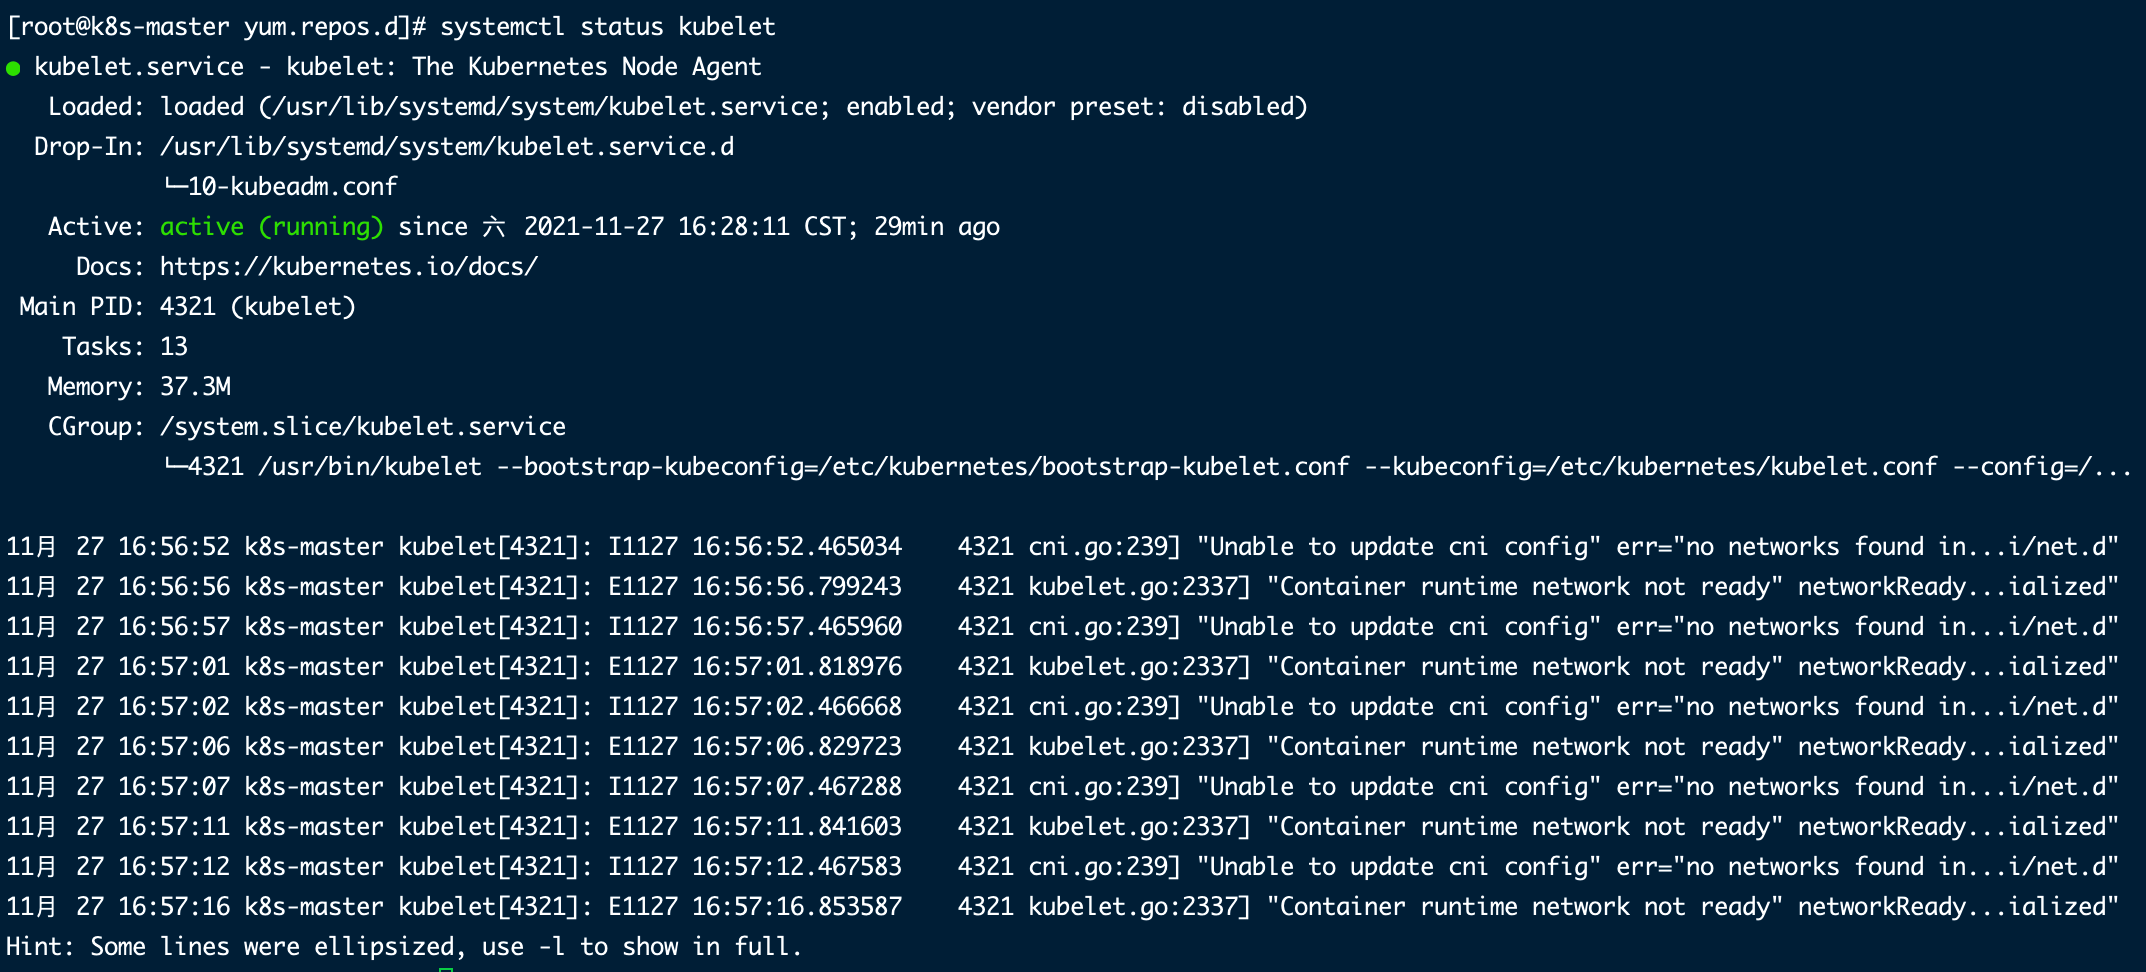
我们发现节点都是NotReady,这个是时候我们就需要容器网络插件了。可以用 journalctl -u kubelet 命令去查看日志。
11月 27 16:35:58 k8s-master kubelet[4321]: E1127 16:35:58.752401    4321 kubelet.go:2337] "Container runtime network not ready" networkReady="NetworkRea
dy=false reason:NetworkPluginNotReady message:docker: network plugin is not ready: cni config uninitialized"
11月 27 16:36:02 k8s-master kubelet[4321]: I1127 16:36:02.292764    4321 cni.go:239] "Unable to update cni config" err="no networks found in /etc/cni/ne
t.d"
1
2
3
4
2
3
4
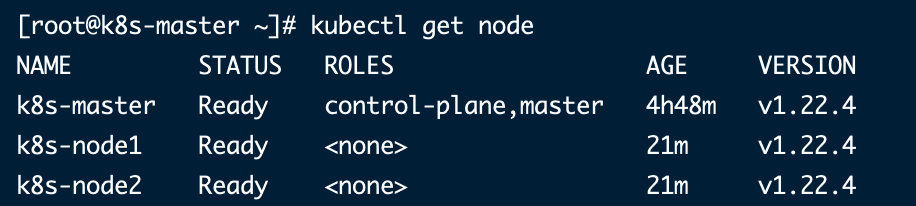
# 6. 部署容器网络(CNI)
wget https://docs.projectcalico.org/manifests/calico.yaml

 # - name: CALICO_IPV4POOL_CIDR
 #   value: "192.168.0.0/16"
改成 10.244.0.0/16 这个网段。

# 安装
kubectl apply -f calico.yaml
1
2
3
4
5
6
7
8
2
3
4
5
6
7
8
# 7. 测试集群
# 8. 部署Dashboard
# 8.1 kubernetes-dashboard安装
wget https://raw.githubusercontent.com/kubernetes/dashboard/v2.4.0/aio/deploy/recommended.yaml
kubectl apply -f recommended.yaml
1
2
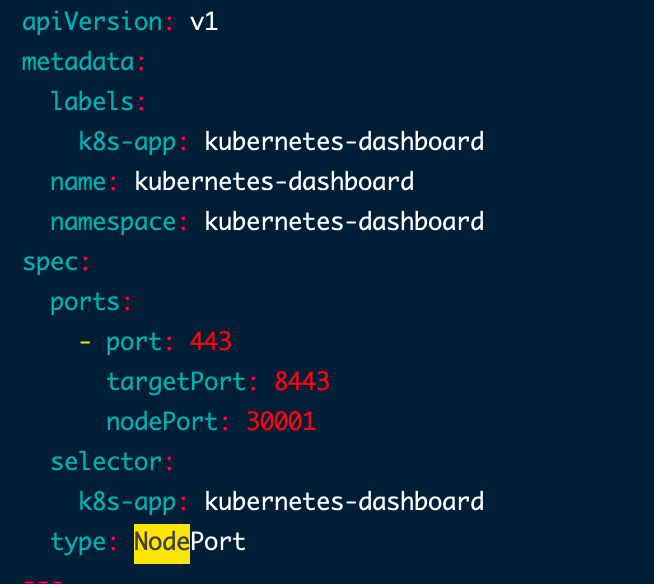
2
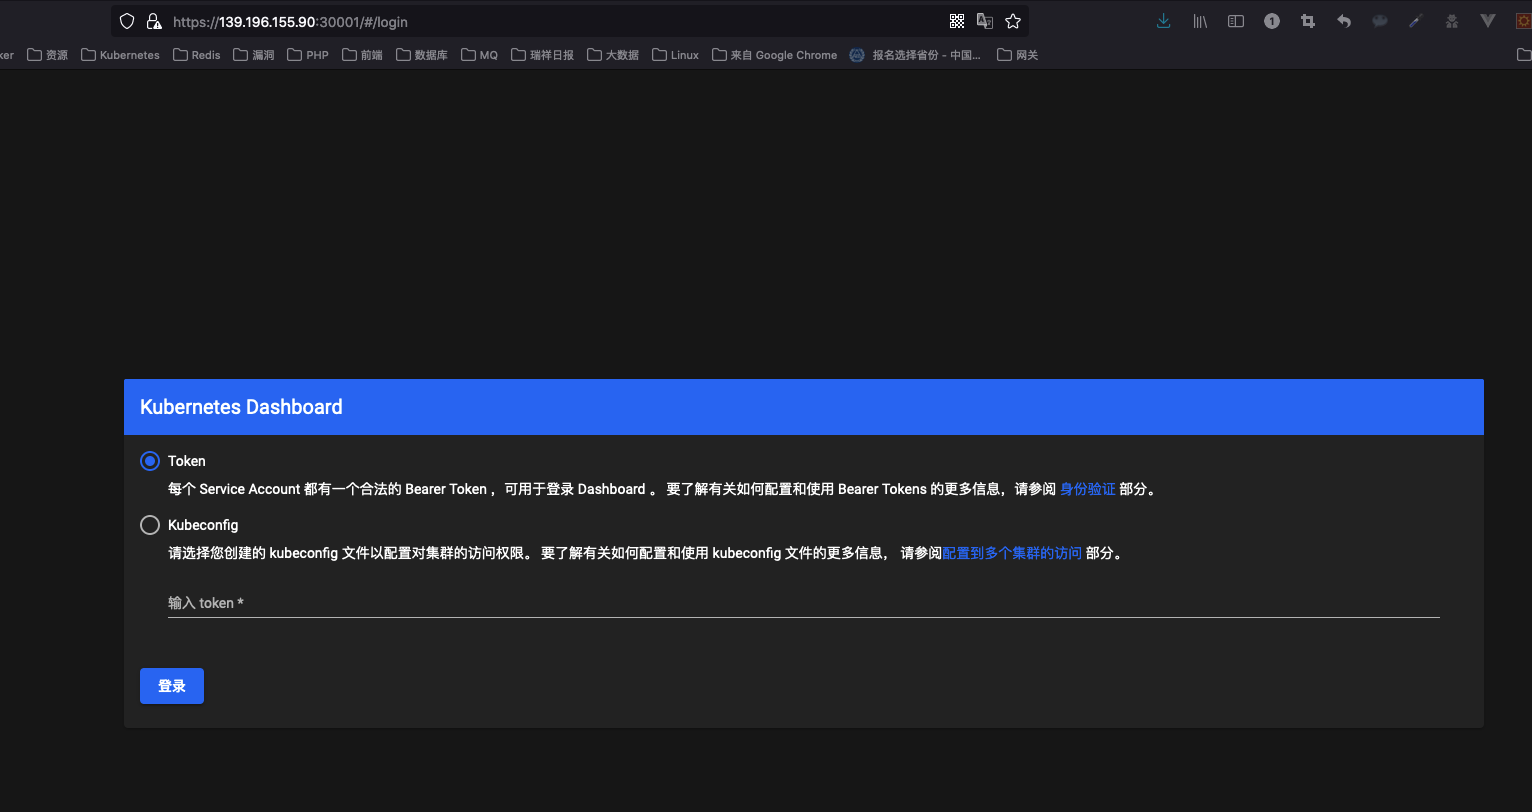
然后在Service kubernetes-dashboard 中加入 type: NodePort,指定nodePort端口为30001。
[root@k8s-master ~]# kubectl get pods,svc -n kubernetes-dashboard
NAME                                            READY   STATUS    RESTARTS   AGE
pod/dashboard-metrics-scraper-c45b7869d-88md5   1/1     Running   0          2m43s
pod/kubernetes-dashboard-576cb95f94-fmlj6       1/1     Running   0          2m43s

NAME                                TYPE        CLUSTER-IP       EXTERNAL-IP   PORT(S)         AGE
service/dashboard-metrics-scraper   ClusterIP   10.101.109.245   <none>        8000/TCP        2m43s
service/kubernetes-dashboard        NodePort    10.105.112.68    <none>        443:30001/TCP   2m43s
1
2
3
4
5
6
7
8
2
3
4
5
6
7
8
创建service account并绑定默认cluster-admin管理员集群的角色:
# 创建用户
kubectl create serviceaccount dashboard-admin -n kube-system
# 用户授权
kubectl create clusterrolebinding dashboard-admin --clusterrole=cluster-admin --serviceaccount=kube-system:dashboard-admin
# 获取用户token
kubectl describe secrets -n kube-system $(kubectl -n kube-system get secret | awk '/dashboard-admin/{print $1}')
1
2
3
4
5
6
2
3
4
5
6
使用输出的token登录dashboard。
[root@k8s-master ~]# kubectl create serviceaccount dashboard-admin -n kube-system
serviceaccount/dashboard-admin created
[root@k8s-master ~]# kubectl create clusterrolebinding dashboard-admin --clusterrole=cluster-admin --serviceaccount=kube-system:dashboard-admin
clusterrolebinding.rbac.authorization.k8s.io/dashboard-admin created
[root@k8s-master ~]# kubectl describe secrets -n kube-system $(kubectl -n kube-system get secret | awk '/dashboard-admin/{print $1}')
Name:         dashboard-admin-token-bcn2f
Namespace:    kube-system
Labels:       <none>
Annotations:  kubernetes.io/service-account.name: dashboard-admin
              kubernetes.io/service-account.uid: 061ebc84-5c97-47f2-b77a-8393c7934662

Type:  kubernetes.io/service-account-token

Data
====
ca.crt:     1099 bytes
namespace:  11 bytes
token:      eyJhbGciOiJSUzI1NiIsImtpZCI6InpieVltNUo1blVtX0pON3F3RlpEbVo1ZHREc0VUUDR2Q0VIREVNRl9ieVUifQ.eyJpc3MiOiJrdWJlcm5ldGVzL3NlcnZpY2VhY2NvdW50Iiwia3ViZXJuZXRlcy5pby9zZXJ2aWNlYWNjb3VudC9uYW1lc3BhY2UiOiJrdWJlLXN5c3RlbSIsImt1YmVybmV0ZXMuaW8vc2VydmljZWFjY291bnQvc2VjcmV0Lm5hbWUiOiJkYXNoYm9hcmQtYWRtaW4tdG9rZW4tYmNuMmYiLCJrdWJlcm5ldGVzLmlvL3NlcnZpY2VhY2NvdW50L3NlcnZpY2UtYWNjb3VudC5uYW1lIjoiZGFzaGJvYXJkLWFkbWluIiwia3ViZXJuZXRlcy5pby9zZXJ2aWNlYWNjb3VudC9zZXJ2aWNlLWFjY291bnQudWlkIjoiMDYxZWJjODQtNWM5Ny00N2YyLWI3N2EtODM5M2M3OTM0NjYyIiwic3ViIjoic3lzdGVtOnNlcnZpY2VhY2NvdW50Omt1YmUtc3lzdGVtOmRhc2hib2FyZC1hZG1pbiJ9.lblbsrNanJYnMqgq7L5lfvuhzCCcQjzCU9B5xS_6i_aPqq3s6w8RNLYP1IiDFU36PvpUlgbgWga6u-G1Kzpppde8wJbNoOqwuso3jS1svXd_yKBu_R499j6K96OtdWONalUq5RpVAEjocEFisPnsSmmTXWbuZ_govhpith8rGr_SpoZid0hd12PWcYOMIVzGgw6Wp_C9NFADnUhaf1QJxSVIt8kOtRmHoMvnX_GfCc1x-2pEL9RudUxO-xF6Mxo9pboo3o4igkIrWxpVgJj_O3BxTmsUwqP2AMxS94qh4TtyMwNMQKJiWMUdJsKacHfn1YkoIfNqE_9iPJ1_D0I13Q
1
2
3
4
5
6
7
8
9
10
11
12
13
14
15
16
17
18
2
3
4
5
6
7
8
9
10
11
12
13
14
15
16
17
18
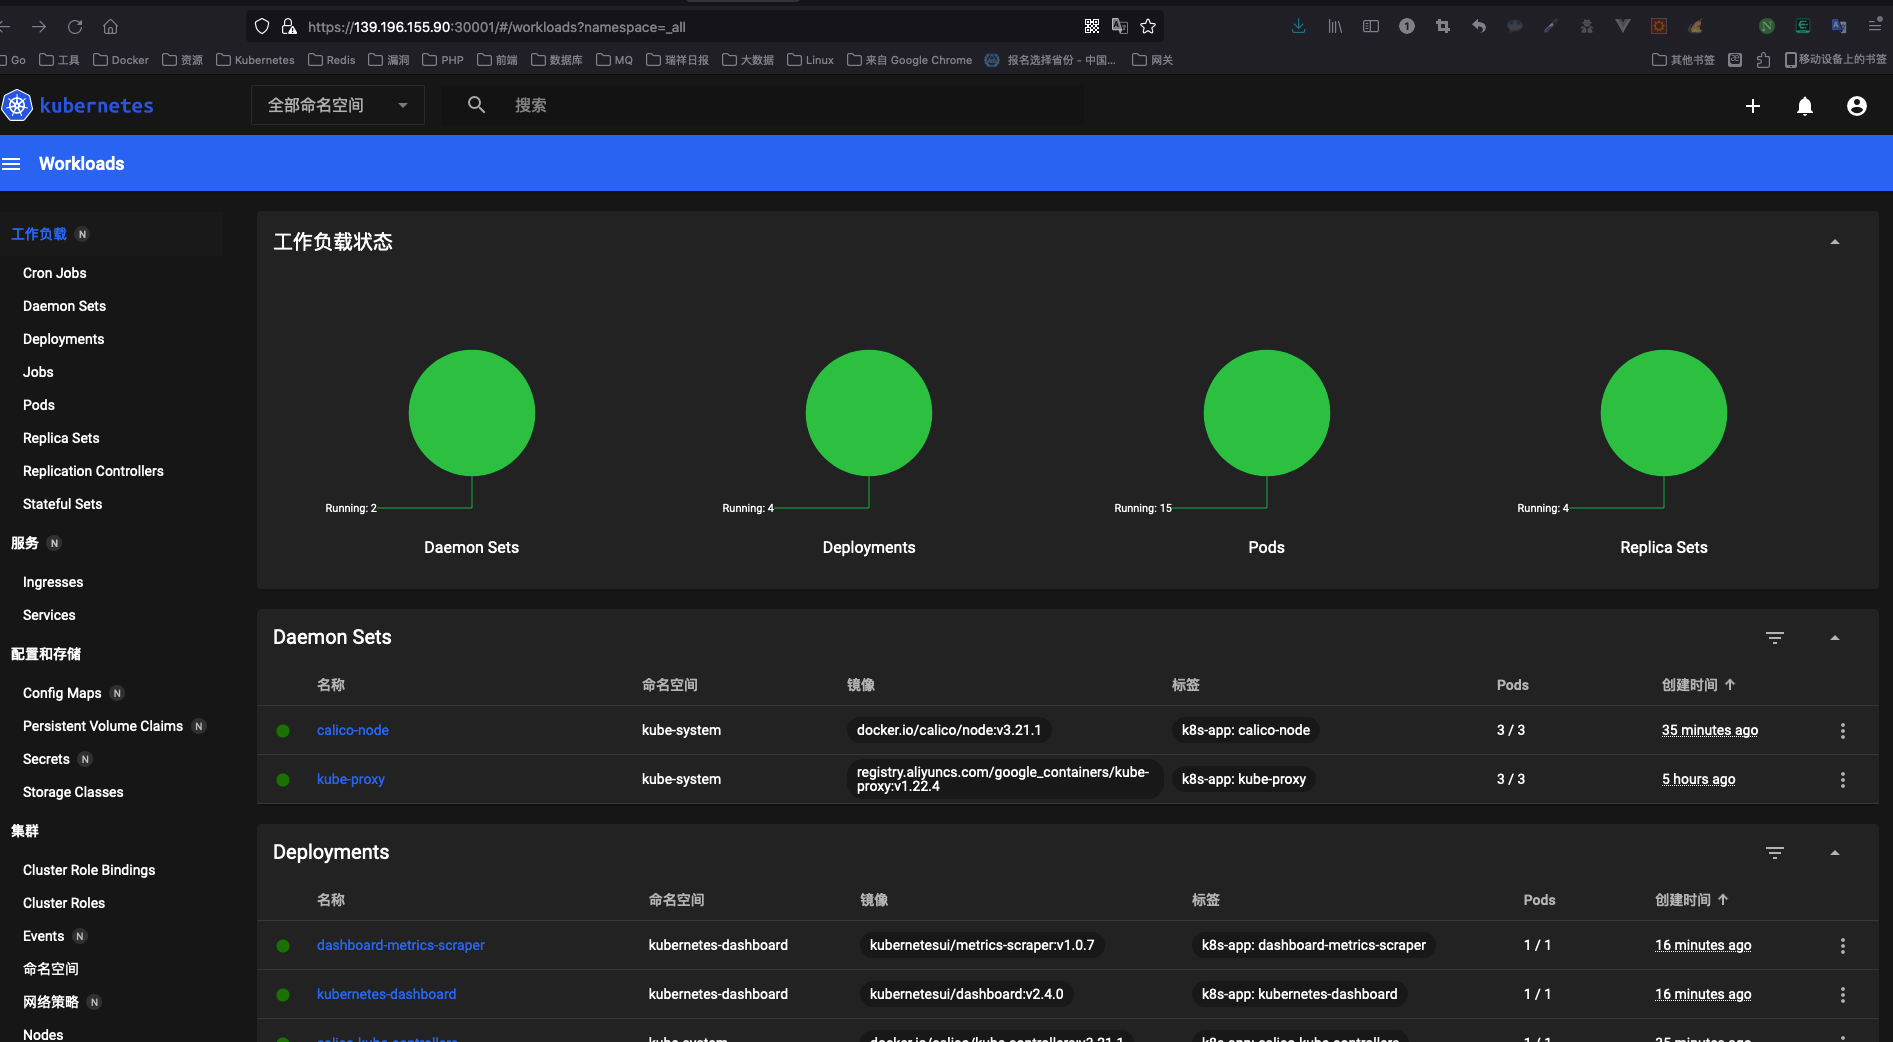
现在我们就可以看到UI页面了。
# 8.2 kuboard安装
sudo docker run -d \
  --restart=unless-stopped \
  --name=kuboard \
  -p 80:80/tcp \
  -p 10081:10081/tcp \
  -e KUBOARD_ENDPOINT="http://172.16.109.178:80" \
  -e KUBOARD_AGENT_SERVER_TCP_PORT="10081" \
  -v /root/kuboard-data:/data \
  eipwork/kuboard:v3
1
2
3
4
5
6
7
8
9
2
3
4
5
6
7
8
9
# 8.3 kuboard升级
docker stop $(docker ps -a | grep "eipwork/kuboard" | awk '{print $1 }')
docker rm $(docker ps -a | grep "eipwork/kuboard" | awk '{print $1 }')

sudo docker run -d \
  --restart=unless-stopped \
  --name=kuboard \
  -p 80:80/tcp \
  -p 10081:10081/udp \
  -p 10081:10081/tcp \
  -e KUBOARD_ENDPOINT="http://10.7.11.52:80" \
  -e KUBOARD_AGENT_SERVER_UDP_PORT="10081" \
  -e KUBOARD_AGENT_SERVER_TCP_PORT="10081" \
  -v /root/kuboard-data:/data \
  eipwork/kuboard:v3
1
2
3
4
5
6
7
8
9
10
11
12
13
14
2
3
4
5
6
7
8
9
10
11
12
13
14
# 参考
← 快速入门 kubectl常用命令 →